
A Comprehensive Guide for Contractors and DIY Enthusiasts
How to attach deck railing posts is an essential task for ensuring the safety and stability of your deck. Whether you’re a general contractor, a deck builder, or a DIY enthusiast, knowing how to securely install these posts can make the difference between a safe, durable deck and a structure that becomes a safety hazard.
In this guide, we’ll show you step-by-step instructions on how to attach deck railing posts securely, meeting building codes, and providing lasting durability.
Why Proper Post Attachment Matters for Deck Safety
When learning how to attach deck railing posts, it’s crucial to remember that these posts are the backbone of your railing system. Building codes, such as the IRC (International Residential Code), require deck railings to withstand a 200-pound concentrated load. Failing to install the posts correctly can lead to dangerous wobbling, which is a safety risk, especially for elevated decks.
Tools and Materials You’ll Need to Attach Deck Railing Posts
Before we dive into how to attach deck railing posts, gather the following essential tools and materials:
- 4×4 treated-lumber posts
- ½-inch diameter through bolts, washers, and nuts
- Simpson Strong-Tie screws or ThruLok bolts
- Simpson DTT2Z tension ties (for extra reinforcement)
- Power drill and ½-inch drill bit
- Clamps, tape measure, framing square, and pencil
With these tools, you’ll be able to properly secure the posts to meet building code requirements for how to attach deck railing posts.
Step-by-Step Guide: How to Attach Deck Railing Posts
1. Review Local Building Codes Before Attaching Railing Posts
The first step in learning how to attach deck railing posts is reviewing your local building codes. Building codes vary, but most require deck railings for decks higher than 30 inches above ground, with minimum heights of 36 inches and a maximum spacing of 6 feet between posts. Be sure to use corrosion-resistant fasteners such as stainless steel or hot-dipped galvanized bolts to prevent long-term damage.
2. Preparing Your Deck for Railing Post Installation


Proper preparation is key when you’re figuring out how to attach deck railing posts. Adding blocking to the deck frame is crucial for reinforcing the post connections and ensuring long-term stability. Blocking helps prevent the rim joist from rotating under pressure, which could otherwise compromise the strength of your deck railing.
3. How to Attach Deck Railing Posts with Through-Bolts


Through-bolts are one of the most reliable methods for how to attach deck railing posts:
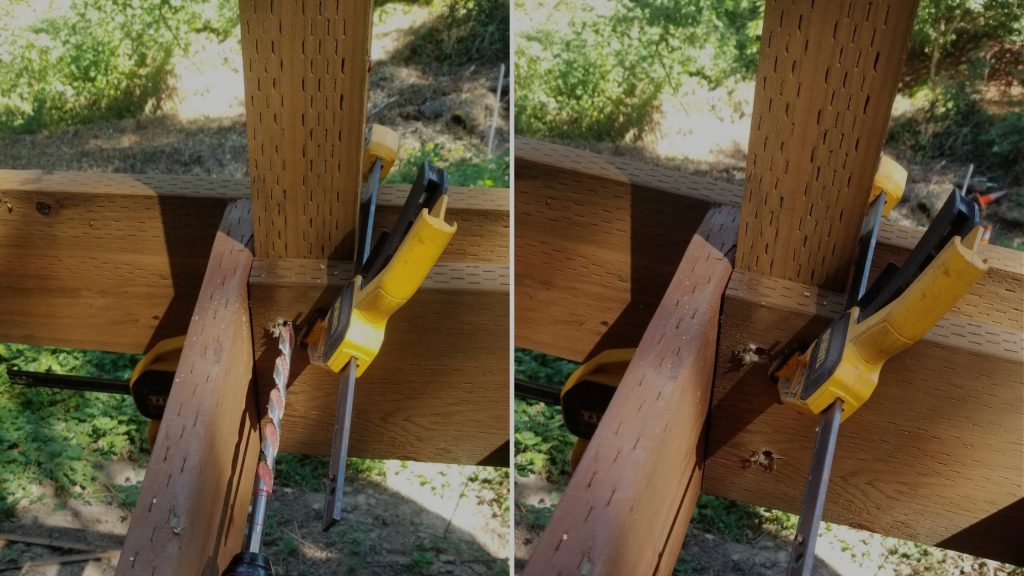
- Position the Post: Clamp the post in place against the rim joist. Make sure it’s properly aligned and plumb.
- Pre-Drill Holes: Use a ½-inch drill bit to pre-drill holes through the post, rim joist, and blocking.
- Insert Through-Bolts: Hammer in ½-inch diameter through-bolts, attach washers, and nuts, and tighten securely using a socket wrench.
This method ensures the post is securely fastened and won’t wobble, which is a critical part of learning how to attach railing posts to an existing deck.
4. Installing Metal Post Anchors: A Faster Method
For those wondering how to attach railing posts to an existing deck without damaging the surface, metal post anchors are an ideal solution. These are especially useful when installing posts on composite or PVC decking.
- Install the Post Anchor: Place the anchor at the desired location, insert the post, and secure with screws.
- Use Lag Screws: Pre-drill holes and use lag screws to attach the anchor to the deck surface.
This method simplifies how to attach railing post to deck surfaces without compromising strength.
5. Securing Corner Posts for Maximum Strength
Corner posts experience more pressure, making it crucial to understand how to attach rail post to deck corners securely. For stronger corners:
- Dual-Post Corner Installation: Install two posts at each corner, spaced 12-16 inches apart, and reinforce them with additional blocking.
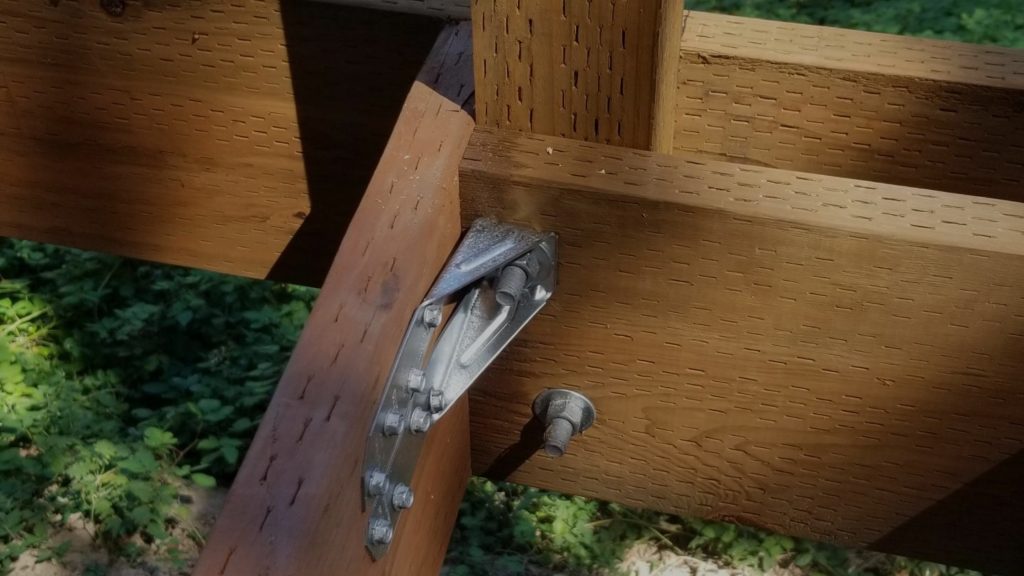
- Single-Post Corner Installation: Use Simpson DTT2Z connectors to securely fasten single corner posts, ensuring compliance with building codes.
Both methods provide excellent answers to how to attach deck railing posts in high-stress areas like corners.
6. Using Steel Tension Ties for Enhanced Security


For extra security, especially in high-traffic areas or regions prone to extreme weather, using steel tension ties like Simpson DTT2Z ensures you meet the load requirements of 500 pounds. These tension ties are critical for understanding how to attach deck railing posts that must withstand intense force.
- Install the Tension Tie: Attach the tension tie to the joist or blocking, and bolt it through the post with a ½-inch diameter through-bolt.
- Tighten Securely: Follow the manufacturer’s guidelines to ensure everything is tight and stable.
7. Attaching Balusters and Rails to Deck Posts
Once the posts are securely in place, the next step in how to attach deck railing to posts is adding balusters and rails:
- Attach Top and Bottom Rails: Secure the top and bottom rails to the posts using stainless steel screws. Ensure the top rail can withstand 200 pounds of pressure, as required by building codes.
- Install Balusters: Balusters should be spaced no more than 4 inches apart to prevent children or pets from slipping through. Use screws or spiral-shank nails to secure each baluster.
Common Mistakes to Avoid When Learning How to Attach Deck Railing Posts
When you’re figuring out how to attach deck railing posts, it’s essential to avoid these common mistakes:
- Using Lag Screws Instead of Through-Bolts: Lag screws loosen over time, leading to instability. Always use through-bolts for the most secure attachment.
- Skipping Blocking: Proper blocking is vital to reinforce the post connection and prevent the rim joist from twisting.
- Incorrect Fastener Placement: Ensure fasteners are spaced properly to prevent splitting wood and weakening the structure.
Expert Tips for Stronger Deck Railing Posts
- Use Corrosion-Resistant Fasteners: When learning how to attach railing posts to deck, choose hot-dipped galvanized or stainless-steel fasteners for long-lasting durability in all weather conditions.
- Slope Post Tops to Prevent Water Damage: Slope the tops of the posts slightly to prevent water from pooling and causing rot.
- Utilize Custom Baluster Layouts: For a modern look, use unique baluster layouts or metal balusters. This adds style while maintaining safety standards.
Mastering How to Attach Deck Railing Posts for a Durable Deck
Learning how to attach deck railing posts properly is key to ensuring the safety and longevity of your deck. Whether you’re using through-bolts, tension ties, or metal anchors, following the correct steps will give you a strong, code-compliant deck that withstands the test of time.


