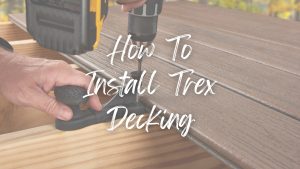

Trex decking is a popular choice due to its durability, low maintenance, and eco-friendly composition. Installing Trex decking properly is crucial to ensure long-lasting performance and a beautiful finish. Follow this guide to learn how to install Trex decking efficiently.
Tools and Safety Measures
Before starting your installation, make sure you have the right tools and prioritize safety. When learning how to install Trex decking, it’s essential to be well-prepared with protective gear and the correct equipment for smooth installation.
Safety Gear:
- Wear Protective Clothing
- Safety Glasses
- Dust Mask
- Gloves
Tools:
- Miter Saw: Use a Trex Blade™ or a carbide-tipped blade with at least 60 teeth for clean cuts.
- Jigsaw: Perfect for detailed cuts, use a carbide-tipped blade for precision.
- Drill: Standard power drills or impact drivers are suitable for installing Trex fasteners.
- Other Essentials: Include a measuring tape, level, and chalk line for precise measurements and markings.
Step 1: Plan Your Deck Layout


Start by planning the layout and understanding the structure of your deck. Ensuring the right gapping and layout is a key part of understanding how to install Trex decking.
- Deck Design: Plan your deck layout to minimize waste and cuts, especially with larger boards. Consider angles, picture framing, and railings in your design.
- Mix and Match Boards: Before installation, mix and match boards to get a blend of colors.
- Gapping Guidelines: Gaps between the boards are necessary for drainage and thermal expansion. Trex decking requires:
- Width-to-Width Gap: 3/16 inches
- End-to-End Gap: 1/8 to 3/16 inches, depending on the temperature during installation.
- Expansion Consideration: Remember, Trex expands in warm temperatures and contracts in cold. Ensure proper spacing to accommodate these changes.
Step 2: Special Patterns and Angles


If you plan on adding special patterns like herringbone or picture framing, make sure to adjust the framing accordingly to support the design. When installing decking at an angle:
- For 45-degree angles: Decrease joist spans by 4 inches.
- For 30-degree angles: Decrease joist spans by half.
Step 3: Trex RainEscape® Installation (Optional)


If you’re planning on installing a Trex RainEscape® drainage system under your deck, plan ahead. Ensure proper placement of drainage materials within the joist system to protect your deck from moisture.
Step 4: Install Framing and Fasteners


Ensure the framing is level and sturdy to support the decking. For framing, use pressure-treated wood or other code-approved materials. This step is important when figuring out how to install Trex decking correctly.
- Framing Requirements: Joists should be spaced at a maximum of 16 inches apart for standard boards or 12 inches for angled installations or heavier traffic areas.
- Fasteners:
- Use Trex Hideaway® Hidden Fasteners for a clean, seamless look.
- For butt joints (where boards meet over a single joist), install Butt Joint Clips with screws on the shared joist.
- Alternative Screws: If not using hidden fasteners, use Trex-recommended color-matched screws.
Step 5: Cut and Install Deck Boards


Ensuring clean cuts and proper fastening techniques is key to a successful installation. Knowing how to install Trex decking involves making precise cuts and adhering to spacing guidelines for optimal results.
- Clean Cuts: Ensure all board ends are clean-cut and square, trimming at least 3/16 inches.
- Routing for Hidden Fasteners: If using square-edge boards, you may need to rout the edges to accommodate hidden fasteners.
- Installation Sequence: Lay boards one at a time, securing each one before moving on to the next to maintain proper spacing.
Start by laying the first board and install fasteners per Trex’s gapping guidelines. For precise cuts around obstacles like posts, use a jigsaw or reciprocating saw. Ensure all boards span at least three joists.
Step 6: Installing Railings and Posts


Adding railings and posts ensures safety and adds to the aesthetics of your deck.
- Post Sleeves: Slide the Trex post sleeves over the wood posts. Cut the sleeves to your desired height if necessary.
- Railings: Attach the railing using Trex railing connectors and secure them per the manufacturer’s guidelines. Make sure they are level and properly aligned.
Step 7: Installing Stairs


When installing stairs, use Trex decking as treads. Ensure the stringers are strong enough to support the weight and that spacing meets local building code requirements.
- Fascia for Stairs: You can use Trex fascia to box in stairs, cutting the fascia to fit the stair stringers for a polished look.
Step 8: Fascia Installation


Trex fascia is installed to cover the edges of the deck, giving it a clean finish. There are two methods:
- Under Decking Fascia: Install fascia underneath the decking edges for optimal aesthetics and performance.
- Beside Decking Fascia: Attach fascia beside the decking using spacers to avoid interference with screws.
Make sure to install fascia fasteners 18 inches apart and at least 1 inch from the top and bottom edges of the rim joist.
Step 9: Handling Common Installation Mistakes


Some common installation mistakes include not adhering to proper gapping guidelines and uneven joist spacing, leading to potential issues later. Avoid these errors:
- Check for Level Framing: Uneven framing will result in poor board alignment.
- Do Not Overtighten Fasteners: Overtightened fasteners can distort the deck boards.
- Allow for Expansion: Make sure gapping guidelines are met for thermal expansion. Boards without proper gapping can buckle under extreme temperatures.
Step 10: Final Adjustments and Clean-Up


After all the boards and fascia are installed:
- Check for Proper Gapping: Ensure that gapping guidelines are met for thermal expansion.
- Clean the Deck: Wipe off any dust or debris. Regular cleaning will help maintain the deck’s appearance.
Pro Tips for Installing Trex Decking
Use Carbide-Tipped Blades:
For clean, precise cuts, always use a carbide-tipped blade with at least 60 teeth when cutting Trex decking boards.
Plan for Expansion:
Always follow Trex’s gapping guidelines (3/16″ width-to-width and 1/8″ to 3/16″ end-to-end) to account for thermal expansion and drainage.
Mix and Match Boards:
Mix decking boards from various packages to blend the natural variations in color for a more consistent and attractive look.
Choose Hidden Fasteners:
For a seamless, screw-free surface, use Trex Hideaway® Hidden Fasteners. This not only improves aesthetics but also protects the deck from potential water damage at fastener points.
Pre-Drill Fascia:
Always pre-drill the fascia to prevent cracking and ensure that screws are spaced evenly at 18 inches apart for a polished, secure finish.
Check Your Tools:
Use the right tools for precision cutting, including a jigsaw for detailed cuts around posts and obstacles.
Adjust Joist Spacing:
When laying boards at an angle (like 45 degrees), reduce joist spacing by 4 inches to ensure adequate support for the decking.
Mind the Stairs:
For stair installations, check local building codes for stringer spacing and make sure to use Trex decking for the stair treads.
Clean as You Go:
After cutting and installing boards, wipe off any dust or debris to maintain a clean work area and a neat finish.
These tips will help ensure your Trex deck is installed efficiently and correctly.
Conclusion
By following this guide on how to install Trex decking, you can ensure a smooth and successful installation. Trex decking offers a low-maintenance, durable option for outdoor spaces, and with proper planning and installation, your deck will provide beauty and functionality for years to come. From framing and gapping to using the right tools and fasteners, attention to detail is key. If you’re looking for further assistance or supplies, consult Trex’s official installation resources or contact Premium Decking Supply for expert advice.


